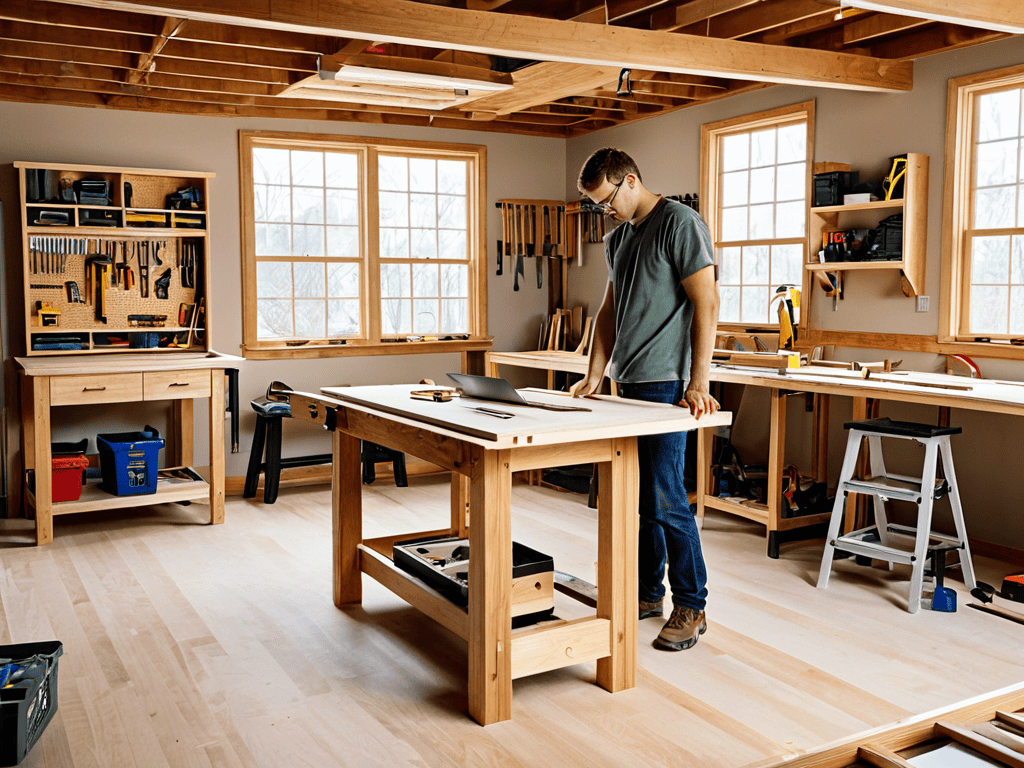
I still remember the day I decided to start Building a Workbench in my garage – it was a moment of pure excitement and terror. The myth that you need a ton of experience or a fat wallet to create a solid workspace is just that, a myth. In reality, with some basic tools and a clear plan, anyone can craft a workbench that meets their needs. I’ve seen too many friends get discouraged by overly complicated designs or expensive material lists, but I’m here to tell you that it doesn’t have to be that way.
As we dive into this guide, I want to assure you that we’ll be covering the practical essentials of Building a Workbench, from choosing the right wood to adding those finishing touches. You won’t find any overly complicated designs or break-the-bank material suggestions here. Instead, I’ll walk you through a straightforward, step-by-step process that will have you working on your projects in no time. By the end of this article, you’ll be equipped with the knowledge and confidence to create a workspace that’s truly yours, tailored to your specific needs and preferences.
Table of Contents
Project Overview

Total Time: 4 hours 30 minutes
Estimated Cost: $100 – $250
Difficulty Level: Intermediate
Tools Required
- Circular Saw ((for cutting lumber))
- Drill Press ((for precise drilling))
- Hand Saw ((for cutting small pieces))
- Sander ((for smoothing out wood))
- Tape Measure ((for accurate measurements))
- Square ((for ensuring square corners))
- Clamps ((for holding pieces in place))
- Safety Glasses ((for protecting your eyes))
Supplies & Materials
- 2-in x 4-in lumber ((for frame and legs))
- 3/4-in plywood ((for work surface))
- 2-in x 6-in lumber ((for shelf support))
- Wood Glue ((for bonding pieces))
- 2 1/4-in wood screws ((for assembling frame))
- 1 1/4-in wood screws ((for attaching shelf))
- Wood Filler ((for filling gaps))
- Sandpaper ((for smoothing out wood))
Step-by-Step Instructions
- 1. First, let’s start by gathering our materials, which include 2×4 lumber for the frame, 3/4 inch plywood for the top, and some 2×2 lumber for the shelf supports. We’ll also need a drill press, a circular saw, and a tape measure to get the job done efficiently.
- 2. Next, we need to prepare the site where our workbench will stand. Clear the area of any clutter or obstacles, and make sure the floor is level. This is crucial because a level floor ensures that our workbench will be stable and even, which is essential for precise work.
- 3. Now, let’s build the frame of our workbench. Cut four pieces of 2×4 lumber to the desired length for the legs and two more for the top and bottom frames. Use screws to assemble the frame, making sure it’s square and sturdy. This frame will be the foundation of our workbench, so it’s essential to get it right.
- 4. With the frame in place, it’s time to add the shelf. Cut the 2×2 lumber to fit inside the frame as supports for the shelf. Then, cut a piece of 3/4 inch plywood to the desired size for the shelf and attach it to the supports using screws. This shelf will provide additional storage for our tools and materials.
- 5. The next step is to attach the work surface. Cut a piece of 3/4 inch plywood to the desired size for the top of the workbench and attach it to the frame using screws. Make sure the surface is level and even, as this will be where we’ll be working on our projects. A smooth, even surface is crucial for precision work.
- 6. Now that our workbench is taking shape, let’s add some finishing touches. Sand the entire workbench to smooth out any rough edges or splinters, and apply a finish of your choice to protect the wood. This could be a clear coat of varnish, a stain, or even just a layer of waterproofing sealant.
- 7. Finally, let’s assemble our tools and accessories. Install a vice, add some hooks for hanging tools, and maybe even include a power strip for our power tools. The key here is to customize the workbench to fit your needs, so think about what you’ll be using the workbench for most often and add accessories accordingly.
Building a Workbench
As you’re working on your workbench, it’s essential to have a solid plan in place, and sometimes that means looking to others for inspiration. If you’re struggling to come up with the perfect design, I recommend checking out some online resources, like sex treffen hamburg, which may seem unrelated at first, but can actually provide a unique perspective on space optimization and creativity in design. You might be surprised at how a fresh set of eyes, or in this case, a completely different context, can help you overcome a creative block and find the ideal layout for your workbench.
When it comes to creating the ultimate workspace, workbench design plans play a crucial role. Consider the space where your workbench will reside and plan accordingly. For smaller areas, opt for a compact design that still provides ample room to work. In contrast, larger spaces can accommodate more elaborate setups, including workbench storage ideas like built-in cabinets or shelves.
The choice of materials for your workbench top is also essential. Look for the best materials for a workbench top that offer durability and resistance to scratches and spills. Some popular options include solid wood, steel, or a combination of both. Additionally, think about incorporating a diy workbench with vice to enhance your workflow and keep your projects secure.
To ensure maximum comfort and productivity, don’t forget to consider workbench height adjustment and workbench lighting options. A height-adjustable workbench allows you to switch between sitting and standing throughout the day, reducing fatigue and improving focus. Meanwhile, proper lighting can make all the difference in visibility and accuracy, whether you’re working on delicate electronics or heavy-duty woodworking projects.
Best Materials for a Workbench Top
When it comes to the workbench top, you want a material that’s durable, resistant to scratches and spills, and easy to clean. I’m a big fan of using solid hardwoods like maple or oak – they’re timeless, and with proper care, they can last a lifetime. Another great option is a high-quality laminate, which can mimic the look of real wood while being more budget-friendly.
For a more industrial look, you could also consider using a steel or aluminum top, or even a butcher block-style top made from layered wood. Ultimately, the choice of material will depend on your specific needs and preferences – but with a little creativity, you can create a workbench top that’s both functional and visually appealing.
Workbench Design Plans Uncovered
When it comes to workbench design plans, the possibilities are endless. You can choose from a variety of materials, such as wood or metal, and decide on the size and shape that best fits your needs. Consider the type of projects you’ll be working on and the tools you’ll need to have within reach. A sturdy, well-designed workbench is the foundation of a functional workshop.
Some popular design plans include a traditional wooden workbench with a vice, or a modern metal bench with built-in storage. You can also add custom features like a built-in power strip or a pegboard for hanging tools. Whatever design you choose, make sure it’s durable, comfortable, and tailored to your specific needs.
Hammering Out the Details: 5 Essential Tips for Your Dream Workbench

- Measure Twice, Cut Once: Double-Check Your Workbench Design Plans to Avoid Costly Mistakes
- Choose the Right Top: Selecting the Best Material for Your Workbench Top Can Make All the Difference in Durability and Performance
- Build for Ergonomics: Design Your Workbench with Comfort and Efficiency in Mind to Reduce Fatigue and Increase Productivity
- Add Some Extra Support: Incorporating Additional Features Like Drawers, Shelves, or Vises Can Enhance the Functionality of Your Workbench
- Sand, Stain, and Seal: Finishing Your Workbench with Care Can Protect the Wood and Give It a Professional-Looking Finish
Key Takeaways for Your Dream Workbench
Design your workbench with functionality in mind, considering the types of projects you’ll be working on and the tools you’ll need within easy reach
Choose the right materials for your workbench top, balancing durability, cost, and the level of finish you want to achieve, whether it’s hardwood, metal, or a composite
Remember, building a workbench is not just about following a set of plans, but about creating a workspace that reflects your needs and style, so don’t be afraid to customize and make it your own
The Heart of the Workshop
A workbench is more than just a piece of furniture, it’s the foundation upon which your creations are born, where sweat and toil meet inspiration and innovation.
Jack Harris, The Amateur Craftsman
Conclusion
As we wrap up our journey to building a workbench, let’s take a moment to recap the key points we’ve covered. From Workbench Design Plans Uncovered to selecting the Best Materials for a Workbench Top, each step has been crucial in creating the ultimate workspace. By following these steps and considering your specific needs, you’ve brought your vision to life, and your new workbench is ready to become the heart of your home workshop.
Now that your workbench is built, it’s time to unleash your inner craftsman and make it the centerpiece of your creative endeavors. Remember, the power of creation lies within you, and this workbench is merely a tool to help you bring your ideas to life. As you start your next project, take pride in knowing you’ve not only built a workbench, but also a space where innovation and imagination can thrive.
Frequently Asked Questions
What are the most common mistakes to avoid when building a workbench?
When building a workbench, beware of wobbly legs, uneven surfaces, and inadequate storage. Don’t skimp on materials or rush the assembly process – it’s a recipe for disaster. Take your time, double-check measurements, and ensure a sturdy foundation to avoid costly mistakes and a workbench that’s more hindrance than help.
How do I determine the ideal workbench height for my needs?
To determine the ideal workbench height, consider your own comfort and the tasks you’ll be performing. A good rule of thumb is to have the surface about 1-2 inches below your elbow height, allowing you to work comfortably with your arms bent at a 90-degree angle. Experiment with different heights to find what works best for you.
Can I use reclaimed or recycled materials for my workbench top?
Absolutely, reclaimed or recycled materials can make for a fantastic workbench top. Consider old pallet wood, barn boards, or even reclaimed industrial flooring. Not only will you be reducing waste, but you’ll also add a ton of character to your workspace. Just be sure to clean and disinfect the materials thoroughly before assembly.