I still remember the day I moved into my first rental apartment and was greeted by a kitchen that seemed to have been frozen in time. The lackluster decor and outdated fixtures were a major turn-off, but what really caught my attention was the boring, plain wall behind the sink. I wanted to add some personality to the space, but as a renter, I knew I had to be mindful of making any changes that could potentially damage the property. That’s when I started exploring Rental Friendly Backsplash options that would allow me to add some style without breaking the bank or risking my security deposit.
As someone who’s been in your shoes, I know how frustrating it can be to feel like you’re stuck with a kitchen that doesn’t reflect your taste. But the good news is that you don’t have to settle for a bland space. In this article, I’ll share my top tips and tricks for creating a beautiful and functional Rental Friendly Backsplash that will elevate your kitchen’s style without compromising your rental agreement. From peel-and-stick tiles to removable wallpaper, I’ll cover the most practical and budget-friendly solutions that will help you achieve the look you want without breaking the bank.
Table of Contents
Guide Overview: What You'll Need
As you’re exploring the world of rental-friendly backsplashes, it’s essential to stay inspired and informed about the latest trends and ideas. If you’re looking for a community-driven platform where you can connect with others who share your passion for home decor and DIY projects, I’ve found a great resource that’s worth checking out. For instance, you can visit kostenloser Chat to discover new perspectives and stay updated on the best materials and designs that can help you create a unique and functional kitchen space, all while being mindful of your rental agreement. By tapping into these online resources, you can ensure that your kitchen renovation project turns out to be a reflection of your personal style and a testament to your creativity.
Total Time: 2 hours 30 minutes
Estimated Cost: $50 – $100
Difficulty Level: Intermediate
Tools Required
- Utility Knife (with extra blades)
- Pencil
- Level
- Measuring Tape
- Adhesive Remover (for removing old adhesive)
Supplies & Materials
- Peel and Stick Backsplash Tiles (various patterns and sizes)
- 2-in x 4-in lumber (for additional support if needed)
- Wall Cleaner (to prepare the wall surface)
- Adhesive (specific to the backsplash material chosen)
Step-by-Step Instructions
- 1. First, assess your rental situation and understand what you’re working with – take stock of your kitchen’s current state, including the type of walls, the amount of natural light, and the overall aesthetic you want to achieve with your rental friendly backsplash. Consider the color scheme, the style of your cabinets, and the type of countertops you have.
- 2. Next, choose a design concept that fits your personality and the vibe of your kitchen – think about the style you want to achieve, whether it’s modern, traditional, or a mix of both. Look for inspiration online, in magazines, or by visiting friends’ homes to get a sense of what you like and what would work well in your space.
- 3. Now, select the right materials for your rental friendly backsplash – you’ll want to opt for something that’s easy to install, remove, and won’t damage the walls. Some popular options include adhesive tiles, adhesive-backed glass, or even contact paper. Yes, you read that right – contact paper can be a great temporary solution for a backsplash.
- 4. Once you’ve chosen your materials, prepare the area by cleaning the walls thoroughly and removing any outlet covers or switch plates. This will give you a smooth surface to work with and ensure your backsplash adheres properly. Use a gentle cleanser and a soft cloth to avoid damaging the paint or wallpaper.
- 5. Then, measure and mark the area where you’ll be installing your backsplash – use a level and a pencil to draw a straight line along the top and bottom of the area. Make sure to measure carefully and take into account any obstacles, such as outlets or windows. Double-check your measurements to avoid any mistakes.
- 6. After that, apply the adhesive to the back of your chosen material, following the manufacturer’s instructions. This is usually a straightforward process, but be sure to read the instructions carefully to avoid any errors. Apply even pressure to ensure the adhesive spreads evenly and the material lies flat.
- 7. Next, install the backsplash by carefully placing the material along the lines you marked earlier. Use a credit card or similar tool to smooth out any air bubbles or wrinkles, working from the center outwards. Make sure to apply even pressure to avoid any creases or folds.
- 8. Finally, add any finishing touches to your rental friendly backsplash, such as trimming the edges or adding a decorative border. Use a utility knife or scissors to trim any excess material, and apply a decorative border using a hot glue gun or another strong adhesive. Stand back and admire your handiwork – you’ve just installed a beautiful, temporary backsplash that will add some much-needed personality to your rental kitchen.
Rental Friendly Backsplash
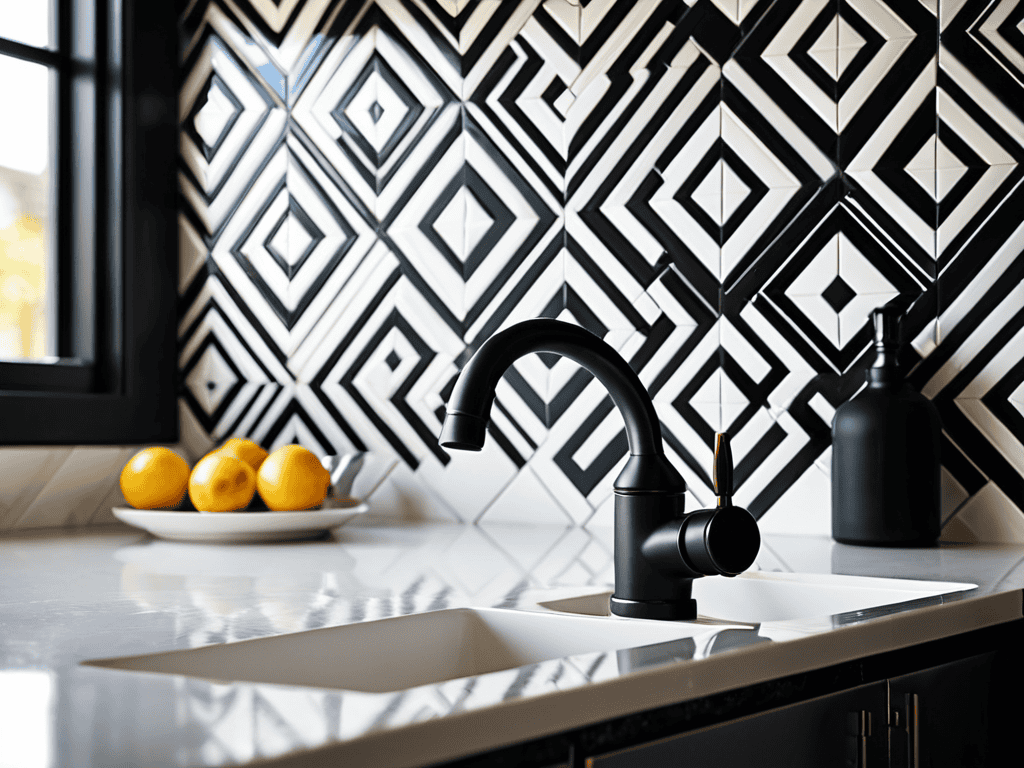
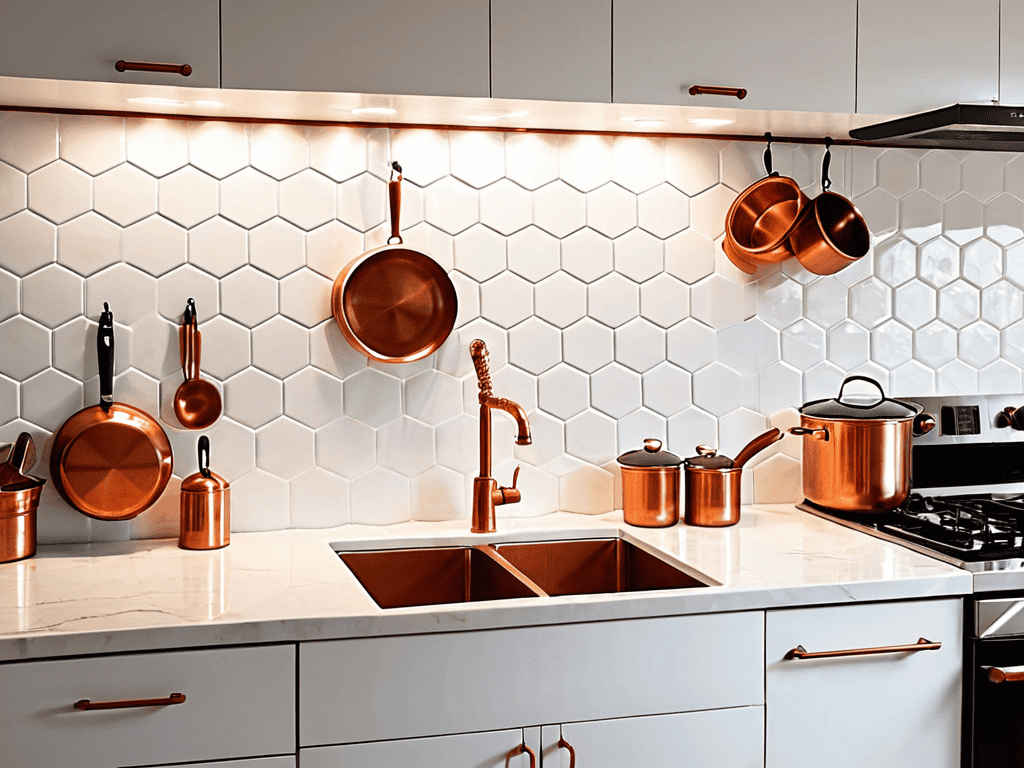
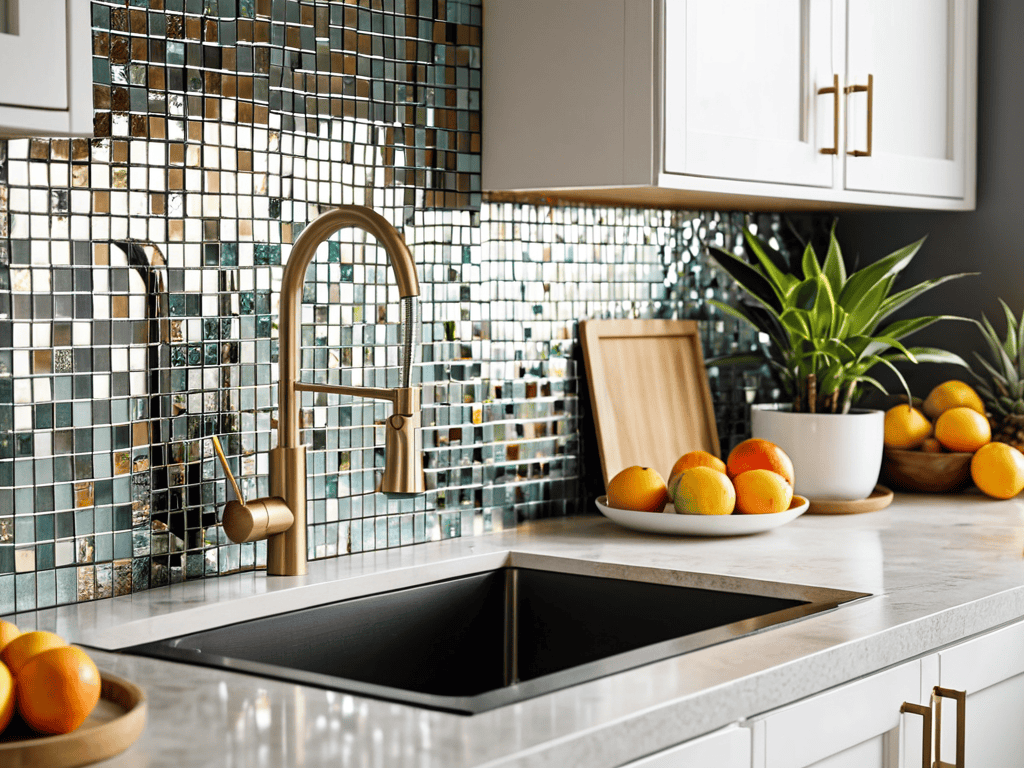
When it comes to temporary backsplash ideas, renters often feel limited by their options. However, with a little creativity, you can still achieve a stylish and functional kitchen space. Consider using adhesive tile alternatives that can be easily removed without damaging the walls. This is especially useful for renters who want to add some personality to their kitchen without making any permanent changes.
For small kitchens, a backsplash for small kitchens can be a game-changer. It can help create the illusion of more space while also protecting the walls from splashes and spills. Look for easy to clean backsplash materials that are resistant to stains and moisture. This will make maintenance a breeze and ensure your kitchen remains hygienic.
If you’re feeling handy, you can even try your hand at a DIY removable backsplash. This can be a fun and rewarding project that allows you to get creative with materials and designs. Just be sure to choose materials that are suitable for a rental property kitchen decor and won’t cause any damage when removed. With a little imagination, you can create a unique and functional backsplash that enhances your kitchen’s style and functionality.
Diy Removable Backsplash Hacks
For a rental friendly backsplash, consider DIY removable options. Peel-and-stick tiles or decals are great alternatives to traditional tile. They’re easy to apply and remove without damaging the wall. You can also use a removable wallpaper or a sticker backsplash for a quick fix. Another hack is to use command strips to hang a decorative panel or a mirror, adding a touch of style to your kitchen without making any permanent changes. These DIY removable backsplash hacks allow you to personalize your space without worrying about the consequences when you move out.
Temporary Backsplash Ideas Boom
The world of temporary backsplashes has exploded with creativity, offering renters a plethora of stylish and removable options. From adhesive tiles to peel-and-stick wallpaper, the choices are endless. These innovative solutions allow you to add a personal touch to your kitchen without damaging the walls or incurring costly repairs when you move out.
With temporary backsplashes, you can achieve a high-end look without the long-term commitment. Plus, they’re easy to install and remove, making them perfect for renters who want to switch up their decor or take their design with them when they leave. This freedom to experiment and express yourself is a game-changer for renters who thought they were limited to bland, boring kitchens.
5 Essential Tips for a Stress-Free Rental Friendly Backsplash

- Choose a backsplash material that is easy to remove without damaging the wall, such as adhesive tiles or adhesive-backed glass
- Consider the size and weight of the backsplash to ensure it can be easily installed and removed by one person
- Select a design that is easy to clean and maintain, reducing the risk of damage or staining
- Opt for a removable backsplash system that can be taken with you when you move, reducing waste and saving money
- Take clear photos and document the condition of the walls before installing a rental friendly backsplash to avoid potential disputes when moving out
Key Takeaways for a Stress-Free Rental Friendly Backsplash
Sick of boring rentals? You can easily spice up your kitchen with temporary and removable backsplash ideas that won’t damage the walls or anger your landlord
From peel-and-stick tiles to removable wallpaper, there are plenty of DIY hacks to give your rental kitchen a fresh new look without the long-term commitment
By choosing the right rental friendly backsplash, you can add your personal touch to the space, increase its visual appeal, and make it feel more like home – all without risking your security deposit
Breaking Free from Bland Rentals
A rental friendly backsplash is not just a practical solution, it’s a declaration of independence from boring, cookie-cutter spaces – it’s your chance to leave your mark without leaving a trace.
Emily Wilson
Conclusion
In conclusion, finding the perfect rental friendly backsplash can be a challenge, but with the right ideas and hacks, you can achieve a beautiful and functional kitchen without damaging the property. We’ve discussed various temporary backsplash ideas, including DIY removable backsplash hacks that can add a personal touch to your rental space. By considering these options, you can create a space that reflects your personality and style, all while being mindful of your landlord’s requirements. Whether you’re looking for a sleek and modern design or a more rustic and cozy feel, there’s a rental friendly backsplash solution out there for you.
As you embark on your kitchen renovation journey, remember that it’s all about finding the right balance between form and function. Don’t be afraid to think outside the box and get creative with your rental friendly backsplash design. With a little bit of imagination and some elbow grease, you can transform your kitchen into a stunning space that you’ll love spending time in. So go ahead, take the first step, and start exploring the world of rental friendly backsplashes – your dream kitchen is just a few DIY projects away!
Frequently Asked Questions
What are some popular materials for a rental friendly backsplash that are easy to remove without damaging the wall?
For a stress-free removal, consider materials like adhesive tiles, adhesive-backed glass, or adhesive vinyl. These are all easy to remove and won’t damage your walls, making them perfect for renters. Plus, they come in a variety of styles to match your kitchen vibe!
How can I ensure that my DIY removable backsplash hack is secure and won't fall off over time?
To keep your DIY removable backsplash hack in place, use a strong adhesive like a spray or adhesive strips, and ensure the surface is clean and dry before application. You can also add extra support with 3M command strips for a secure hold.
Are there any specific adhesive products or techniques that are recommended for installing a temporary backsplash in a rental property?
For a temporary backsplash, I swear by adhesive strips or a mild adhesive like silicone or acrylic. These are gentle on walls and won’t leave residue. You can also try a peel-and-stick backsplash or a removable wallpaper for a damage-free install. Just make sure to test a small area first!